


Pizzagaina Perfection: A Step-by-Step Guide to the Ultimate Easter Pie
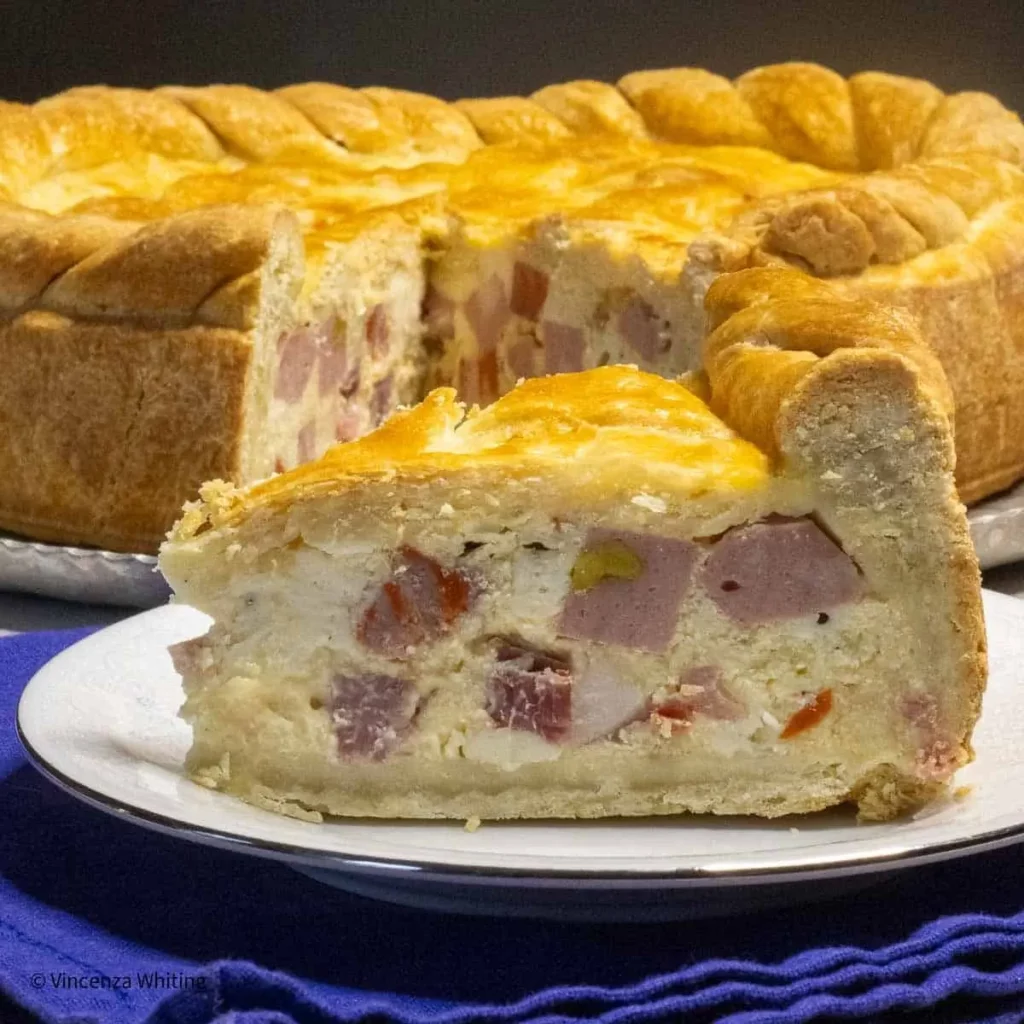
Pizzagaina, also known as Pizza Chiena or Pizza Ripiena, is a magnificent savory pie, traditionally enjoyed during the Easter season in Southern Italy, particularly in regions like Campania. It’s a celebration of the end of Lent, packed with cured meats, cheeses, and eggs. Think of it as the ultimate springtime feast, a dish so rich and satisfying that a single slice is often enough. This isn’t your average pizza; it’s a layered masterpiece that requires a bit of time and effort, but the end result is absolutely worth it. The combination of salty meats, creamy cheeses, and a flaky crust creates a symphony of flavors and textures that will delight your taste buds. This guide will provide you with a detailed, step-by-step recipe to create your own Pizzagaina, ensuring a delicious and impressive Easter centerpiece.
The History of Pizzagaina
The origins of Pizzagaina are deeply rooted in Italian culinary tradition. Its history is linked to the end of the Lenten season, a period of fasting and abstinence from rich foods like meat and cheese. Pizzagaina was created as a way to celebrate the return of these ingredients, using them in abundance to create a decadent and satisfying dish. The name “Pizzagaina” itself reflects this, deriving from the Italian words “pizza” (pie) and “gaino” (meaning “full of good things” or “rich”). Recipes for Pizzagaina vary from family to family and region to region, with each having its own unique twist on the classic dish. However, the core elements – a rich crust and a filling of meats, cheeses, and eggs – remain constant.
Understanding the Key Ingredients
Before we dive into the recipe, let’s break down the key ingredients and their roles in creating the perfect Pizzagaina:
- Crust: The crust is the foundation of the Pizzagaina. It needs to be sturdy enough to hold the filling without becoming soggy, and it should have a pleasant flavor that complements the richness of the ingredients inside. Traditional recipes often use a lard-based crust, which contributes to its flakiness and tenderness. However, you can also use butter or a combination of butter and lard.
- Eggs: Eggs are a crucial element of the filling, providing structure and binding the other ingredients together. They also add richness and a creamy texture. Both whole eggs and hard-boiled eggs are used in Pizzagaina. The hard-boiled eggs are often quartered or sliced and layered throughout the filling.
- Cured Meats: The cured meats are what give Pizzagaina its signature savory flavor. A variety of meats can be used, including:
- Prosciutto: Adds a salty and delicate flavor.
- Sopressata: A dry-cured salami with a slightly spicy kick.
- Capicola: A dry-cured pork shoulder with a rich and savory flavor.
- Italian Sausage (sweet or spicy): Adds depth and heartiness.
- Pepperoni: A classic pizza topping that contributes a slightly spicy and smoky flavor.
- Cheeses: The cheeses contribute to the creamy, cheesy goodness of Pizzagaina. Common choices include:
- Ricotta: Provides a creamy base for the filling. It’s important to use whole-milk ricotta for the best flavor and texture.
- Mozzarella: Adds stretch and a mild, milky flavor.
- Provolone: Offers a slightly sharper and tangier flavor than mozzarella.
- Pecorino Romano: A hard, salty cheese that adds a punch of flavor.
- Parmesan: Another hard cheese that adds a nutty and savory flavor.
- Other Ingredients: Some recipes may include additional ingredients like black pepper, parsley, or other herbs to enhance the flavor.
The Ultimate Pizzagaina Recipe
This recipe provides a detailed guide to making a traditional Pizzagaina. Feel free to adjust the types and amounts of meats and cheeses to your liking. The most important thing is to use high-quality ingredients and to follow the instructions carefully.
Yields: 12-16 servings
Prep Time: 2-3 hours (including chilling time for the dough)
Cook Time: 1 hour 30 minutes to 2 hours
Ingredients:
For the Crust:
- 4 cups all-purpose flour, plus more for dusting
- 1 teaspoon salt
- 1 cup (2 sticks) cold unsalted butter, cut into cubes
- 1/2 cup cold lard, cut into cubes (or use additional butter)
- 1 cup ice water
- 1 large egg, beaten (for egg wash)
For the Filling:
- 1 pound ricotta cheese, whole milk, drained
- 1 pound mozzarella cheese, shredded
- 1/2 pound provolone cheese, shredded
- 1/4 cup grated Pecorino Romano cheese
- 1/4 cup grated Parmesan cheese
- 1/2 pound prosciutto, thinly sliced
- 1/2 pound soppressata, thinly sliced
- 1/2 pound capicola, thinly sliced
- 1/2 pound sweet Italian sausage, removed from casings and cooked
- 1/4 pound pepperoni, thinly sliced
- 6 large eggs, lightly beaten
- 6 hard-boiled eggs, peeled and quartered
- 1/4 cup chopped fresh parsley
- 1 teaspoon black pepper
- Pinch of salt (taste the filling before adding too much, as the meats and cheeses are already salty)
Equipment:
- Large mixing bowls
- Food processor (optional, for making the crust)
- Rolling pin
- 9-inch springform pan
- Parchment paper
- Baking sheet
Instructions:
Making the Crust:
- Combine dry ingredients: In a large bowl, whisk together the flour and salt.
- Cut in the fat: Add the cold butter and lard (or additional butter) to the flour mixture. You can use a pastry blender, your fingers, or a food processor to cut the fat into the flour. The mixture should resemble coarse crumbs with some pea-sized pieces of fat remaining. This is crucial for creating a flaky crust. If using a food processor, pulse until the mixture reaches this consistency. Be careful not to over-process.
- Add the water: Gradually add the ice water, mixing until the dough just comes together. Be careful not to add too much water; you want a dough that is moist but not sticky. If using a food processor, add the water in a slow stream while pulsing until the dough forms a ball.
- Divide and chill: Divide the dough in half, flatten each half into a disc, wrap tightly in plastic wrap, and refrigerate for at least 1 hour, or preferably overnight. This chilling time allows the gluten to relax, resulting in a more tender crust.
Preparing the Filling:
- Combine cheeses: In a large bowl, combine the ricotta cheese, mozzarella cheese, provolone cheese, Pecorino Romano cheese, and Parmesan cheese. Mix well to ensure everything is evenly distributed.
- Add meats: Add the prosciutto, soppressata, capicola, cooked Italian sausage, and pepperoni to the cheese mixture. Gently toss to combine.
- Incorporate eggs and seasonings: Pour the beaten eggs over the cheese and meat mixture. Add the chopped parsley, black pepper, and a pinch of salt (if needed). Mix well to ensure all ingredients are evenly distributed. Taste the filling and adjust seasonings as needed. Remember that the cured meats are already quite salty, so you may not need to add much additional salt.
Assembling the Pizzagaina:
- Preheat oven: Preheat your oven to 350°F (175°C).
- Prepare the pan: Grease a 9-inch springform pan and line the bottom with parchment paper. This will make it easier to remove the Pizzagaina after baking.
- Roll out the bottom crust: On a lightly floured surface, roll out one of the dough discs into a 12-inch circle. Carefully transfer the dough to the prepared springform pan, pressing it into the bottom and up the sides of the pan. Trim any excess dough that hangs over the edge.
- Add the filling: Pour the cheese and meat filling into the crust-lined pan. Spread the filling evenly.
- Layer the hard-boiled eggs: Arrange the quartered hard-boiled eggs evenly over the top of the filling. Gently press them into the filling to ensure they are secure.
- Roll out the top crust: On a lightly floured surface, roll out the remaining dough disc into a 10-inch circle.
- Cover the filling: Carefully place the dough circle over the filling, sealing the edges to the bottom crust. You can crimp the edges with a fork or your fingers to create a decorative border.
- Egg wash and vents: Brush the top crust with the beaten egg. This will give the crust a golden brown color and a glossy finish. Cut a few slits in the top crust to allow steam to escape during baking. This will prevent the crust from becoming soggy.
Baking the Pizzagaina:
- Bake: Place the springform pan on a baking sheet (to catch any drips) and bake in the preheated oven for 1 hour 30 minutes to 2 hours, or until the crust is golden brown and the filling is set. The internal temperature of the filling should reach 165°F (74°C). If the crust starts to brown too quickly, you can tent it with aluminum foil.
- Cool: Remove the Pizzagaina from the oven and let it cool in the pan for at least 30 minutes before releasing the sides of the springform pan.
- Serve: Carefully transfer the Pizzagaina to a serving platter. Slice and serve warm or at room temperature. Pizzagaina is often even better the next day, after the flavors have had a chance to meld together.
Tips for Pizzagaina Perfection:
- Use high-quality ingredients: The quality of your ingredients will directly impact the flavor of your Pizzagaina. Use the best quality meats, cheeses, and eggs you can find.
- Don’t overwork the dough: Overworking the dough will result in a tough crust. Mix the dough until it just comes together, and then chill it for at least an hour to allow the gluten to relax.
- Drain the ricotta cheese: Excess moisture in the ricotta cheese can make the filling soggy. Drain the ricotta cheese in a cheesecloth-lined sieve for at least 30 minutes before using it.
- Don’t overfill the pie: Overfilling the pie can cause the crust to crack or the filling to spill out. Be sure to leave some space at the top of the pan.
- Let the Pizzagaina cool before slicing: Allowing the Pizzagaina to cool for at least 30 minutes before slicing will help the filling to set and prevent it from falling apart.
- Make it ahead of time: Pizzagaina can be made a day or two ahead of time and stored in the refrigerator. This allows the flavors to meld together and makes it even more delicious. Reheat gently before serving.
Variations and Customizations:
While this recipe provides a classic foundation, feel free to experiment with variations and customizations to create your own unique Pizzagaina:
- Meat Variations: Substitute or add other cured meats like salami, mortadella, or ham. You can also use different types of Italian sausage, such as spicy sausage or fennel sausage.
- Cheese Variations: Try using different types of cheese, such as fontina, asiago, or gorgonzola. You can also add a layer of fresh mozzarella slices on top of the filling before adding the top crust.
- Vegetable Additions: Some recipes include vegetables like roasted bell peppers, sautéed onions, or spinach. Be sure to cook any vegetables before adding them to the filling to remove excess moisture.
- Herb Variations: Experiment with different herbs like basil, oregano, or thyme to enhance the flavor of the filling.
- Crust Variations: For a richer crust, try adding a bit of grated Parmesan cheese or herbs to the dough.
- Crustless Pizzagaina: For a lower-carb option, you can make a crustless Pizzagaina by baking the filling in a greased baking dish without a crust.
Serving Suggestions:
Pizzagaina is a complete meal in itself, but it can also be served with a simple side salad or a bowl of soup. It’s traditionally served at Easter celebrations, but it can be enjoyed any time of year. Here are some serving suggestions:
- Easter Brunch: Serve Pizzagaina as the centerpiece of your Easter brunch.
- Family Gatherings: Bring Pizzagaina to potlucks or family gatherings.
- Holiday Celebrations: Enjoy Pizzagaina during other holiday celebrations, such as Christmas or Thanksgiving.
- Picnics: Pack Pizzagaina for a picnic in the park.
- Make-Ahead Meal: Prepare Pizzagaina ahead of time for a convenient and delicious meal.
Storing Leftovers:
Leftover Pizzagaina can be stored in the refrigerator for up to 3-4 days. To reheat, you can microwave individual slices or bake the entire pie in a preheated oven at 350°F (175°C) until warmed through. You can also freeze Pizzagaina for longer storage. Wrap individual slices tightly in plastic wrap and then place them in a freezer bag. Frozen Pizzagaina can be stored for up to 2-3 months. Thaw in the refrigerator overnight before reheating.
Conclusion
Pizzagaina is more than just a pie; it’s a celebration of tradition, family, and the joy of good food. While it may seem daunting at first, this recipe breaks down the process into manageable steps, ensuring that even novice bakers can create a stunning and delicious Pizzagaina. So gather your ingredients, roll up your sleeves, and get ready to embark on a culinary adventure that will impress your friends and family. Buon appetito!