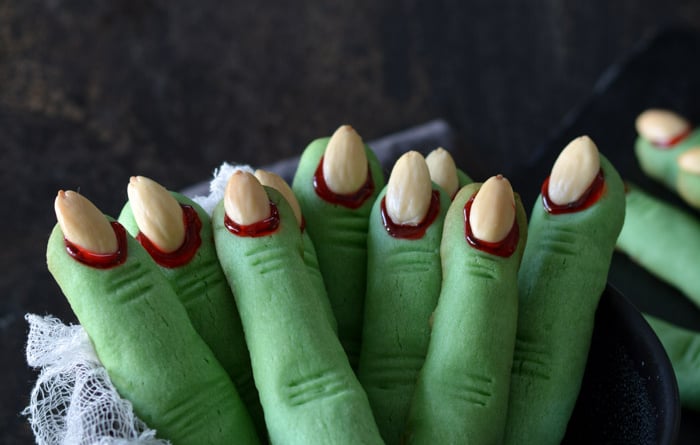
Spook-tacular Halloween Witch Fingers: A Fun and Easy Recipe!
Halloween is just around the corner, and what better way to celebrate than by crafting some creepy-crawly treats that are sure to delight (and maybe scare) your friends and family? Enter Halloween Witch Fingers! These eerie snacks are not only simple to make but are also a fun activity for kids and adults alike. With a few basic ingredients, you can create a platter of finger-shaped cookies that will be the centerpiece of your Halloween festivities. So, let’s summon our inner witches and get ready to bake!
Ingredients
To create these hauntingly delicious witch fingers, you’ll need the following ingredients:
For the Cookie Dough:
- 1 cup unsalted butter (softened)
- 1 cup powdered sugar
- 1 egg
- 1 teaspoon vanilla extract
- 2 cups all-purpose flour
- 1 teaspoon almond extract (optional for a nutty flavor)
- 1/2 teaspoon salt
- Green food coloring (optional)
For the Decorations:
- Sliced almonds (these will serve as fingernails)
- Red gel food coloring or raspberry jam (for the “blood” effect)
Instructions
Step 1: Prepare the Cookie Dough
- In a large bowl, cream together the softened butter and powdered sugar until light and fluffy. This should take about 2-3 minutes with a hand mixer or stand mixer.
- Beat in the egg and vanilla extract until fully incorporated. If you’re using almond extract, add that in as well for an extra twist!
- Gradually add in the flour, salt, and, if desired, a few drops of green food coloring to give your fingers a spooky, witchy hue. Mix until a dough forms.
Step 2: Shape the Witch Fingers
- Preheat your oven to 325°F (160°C) and line a baking sheet with parchment paper.
- Take small portions of dough (about 1 tablespoon) and roll them into finger shapes. Aim for about 3-4 inches in length and slightly thicker at the base to mimic a finger’s shape.
- Using a knife or a tool, create knuckle lines by pressing gently into the dough.
- At the tip of each finger, press an almond slice to resemble a creepy fingernail.
Step 3: Bake the Cookies
- Place the shaped cookies on the prepared baking sheet, leaving space between them, as they will spread slightly during baking.
- Bake in the preheated oven for 15-20 minutes or until the edges are lightly golden. Be careful not to overbake them; you want them to remain a bit soft!
Step 4: Add the Finishing Touches
- Once the cookies are cooled, it’s time to give them a bloody flair! Use a small brush or a toothpick to dab red gel food coloring or raspberry jam around the edges of the almond nails and fingers for that gruesome effect.
- Let the decorations set for a bit, and voilà! Your Halloween Witch Fingers are ready to haunt your table!
Tips for Ghostly Goodness
- Storage: These cookies can be stored in an airtight container for up to a week, but they’re so delicious, we doubt they’ll last that long!
- Variations: Experiment with different shapes or colors. You could also add chocolate chips to the dough for a more decadent treat.
- Make it a Party: Set up a witch finger decorating station at your Halloween party. Let your guests add their own “bloody” touches for a fun and interactive activity!
These Halloween Witch Fingers are the perfect blend of deliciousness and frightful fun. Whether you’re hosting a spooky soirée, heading to a costume party, or just want to indulge in some ghoulishly good treats at home, this recipe will add that special magical touch to your Halloween celebrations. Grab your baking supplies, gather your little witches and wizards, and let the Halloween festivities begin! Happy Haunting! 🎃🧙♀️👻
No tags for this post.