


Umami Bomb: Mastering the Miso Aioli Recipe
Miso aioli is a delectable condiment that elevates everything from simple vegetables to grilled meats. It’s a creamy, flavorful sauce that combines the richness of mayonnaise with the savory depth of miso paste. The result is an umami explosion that will have your taste buds singing. This comprehensive guide will walk you through everything you need to know to create the perfect miso aioli at home, covering ingredient selection, step-by-step instructions, variations, serving suggestions, and storage tips.
## What is Miso Aioli?
Miso aioli is essentially a flavored mayonnaise, where the traditional ingredients of aioli (garlic, olive oil, egg yolks, lemon juice) are enhanced with miso paste. Miso paste, a fermented soybean paste, brings a salty, savory, and slightly sweet flavor profile, adding a complex depth that regular aioli lacks. The fermentation process also contributes to the umami, the fifth taste, which is often described as savory and meaty.
## Why Miso Aioli is a Must-Try
* **Umami Richness:** Miso paste provides a significant umami boost, making the aioli incredibly flavorful and satisfying.
* **Versatile Condiment:** It pairs well with a wide range of dishes, from fries and sandwiches to grilled vegetables and seafood.
* **Easy to Make:** With a few simple ingredients and steps, you can whip up a batch of miso aioli in minutes.
* **Customizable:** The recipe is easily adaptable to your personal taste preferences. You can adjust the amount of miso, garlic, and other ingredients to create your perfect flavor profile.
* **Adds Depth to Simple Dishes:** Even a basic grilled chicken or steamed broccoli can be transformed into a culinary delight with a dollop of miso aioli.
## Ingredients for Miso Aioli
Here’s a breakdown of the ingredients you’ll need to make miso aioli:
* **Mayonnaise:** This is the base of the aioli. Use a high-quality mayonnaise for the best flavor. Full-fat mayonnaise is recommended for richness and stability. You can use store-bought or homemade mayonnaise. If you’re making your own, ensure you follow a reliable recipe and use pasteurized eggs for safety.
* **Miso Paste:** The star ingredient! There are several types of miso paste, each with a unique flavor profile. Here’s a quick overview:
* **Shiro Miso (White Miso):** This is the mildest and sweetest type of miso. It’s made with a high rice-to-soybean ratio and ferments for a shorter period. Shiro miso is a great starting point for miso aioli, especially if you’re new to miso.
* **Aka Miso (Red Miso):** This miso has a stronger, saltier, and more intense flavor. It’s made with a higher soybean-to-rice ratio and ferments for a longer period. Use aka miso sparingly, as it can easily overpower the other flavors.
* **Awase Miso (Mixed Miso):** This is a blend of different types of miso, typically shiro and aka. It offers a balanced flavor profile that’s a good compromise between the sweetness of shiro and the intensity of aka.
* **Mugi Miso (Barley Miso):** Made with barley, this miso has a slightly earthy and nutty flavor. It can add a unique twist to your aioli.
* **Hatcho Miso (Soybean Miso):** This is the darkest and most intensely flavored miso, made solely from soybeans. It’s best used in small quantities and can be too strong for some palates.
For a balanced and approachable miso aioli, **shiro miso** or **awase miso** are generally the best choices. Experiment with different types to find your favorite.
* **Garlic:** Fresh garlic is essential for aioli. The garlic adds a pungent aroma and flavor that complements the miso. Use fresh cloves and mince them finely or use a garlic press.
* **Lemon Juice:** The acidity of lemon juice brightens the aioli and balances the richness of the mayonnaise and miso. Freshly squeezed lemon juice is always preferred over bottled.
* **Rice Vinegar (Optional):** Adding a touch of rice vinegar can enhance the acidity and add a subtle sweetness. It complements the miso flavor well.
* **Sesame Oil (Optional):** A small amount of toasted sesame oil can add a nutty aroma and depth to the aioli. Use it sparingly, as its flavor can be quite strong.
* **Ginger (Optional):** A tiny amount of grated fresh ginger can add a subtle warmth and spice to the aioli. It pairs well with the other Asian-inspired flavors.
* **Black Pepper:** Freshly ground black pepper adds a touch of spice and enhances the overall flavor.
* **Water (Optional):** Use a little water to thin the aioli to your desired consistency.
## Equipment You’ll Need
* **Mixing Bowl:** For combining the ingredients.
* **Whisk or Fork:** For emulsifying the aioli.
* **Garlic Press or Knife:** For mincing the garlic.
* **Measuring Spoons and Cups:** For accurate ingredient measurements.
* **Small Jar or Container:** For storing the aioli.
## Miso Aioli Recipe: Step-by-Step Instructions
Here’s a detailed recipe for making miso aioli at home:
**Yields:** Approximately 1 cup
**Prep time:** 5 minutes
**Ingredients:**
* 1 cup mayonnaise
* 2 tablespoons shiro miso (white miso) or awase miso (mixed miso)
* 2 cloves garlic, minced
* 1 tablespoon lemon juice, freshly squeezed
* 1 teaspoon rice vinegar (optional)
* ½ teaspoon toasted sesame oil (optional)
* ¼ teaspoon grated fresh ginger (optional)
* Freshly ground black pepper to taste
* 1-2 tablespoons water (optional, for thinning)
**Instructions:**
1. **Prepare the Garlic:** Mince the garlic cloves finely using a garlic press or a sharp knife. The finer the garlic, the better it will incorporate into the aioli. If you prefer a milder garlic flavor, you can roast the garlic cloves before mincing them. To roast garlic, cut off the top of a head of garlic, drizzle with olive oil, wrap in foil, and bake at 400°F (200°C) for 40-50 minutes, or until soft and fragrant. Let cool slightly before squeezing out the roasted garlic cloves. This will mellow the garlic flavor and add a subtle sweetness.
2. **Combine the Ingredients:** In a medium mixing bowl, combine the mayonnaise, miso paste, minced garlic, lemon juice, rice vinegar (if using), sesame oil (if using), and ginger (if using). Start with a small amount of miso paste (1 tablespoon) and taste as you go, adding more to your liking. Remember that the flavor will intensify as the aioli sits.
3. **Mix Well:** Use a whisk or a fork to thoroughly mix all the ingredients together until smooth and creamy. Ensure that the miso paste is fully incorporated and there are no lumps. If the aioli is too thick, add water, one tablespoon at a time, until you reach your desired consistency. The consistency should be thick enough to cling to food, but not so thick that it’s difficult to spread.
4. **Season with Pepper:** Add freshly ground black pepper to taste. You can also add a pinch of salt, but be mindful that miso paste is already quite salty.
5. **Adjust to Taste:** Taste the aioli and adjust the ingredients as needed. If it’s too salty, add a little more lemon juice or mayonnaise. If it’s not flavorful enough, add more miso paste or garlic. If it’s too thick, add a little water. This is your opportunity to customize the aioli to your personal preferences.
6. **Chill (Optional):** For the best flavor, cover the aioli and refrigerate it for at least 30 minutes before serving. This allows the flavors to meld together and the aioli to thicken slightly. However, it can be served immediately if you’re in a rush.
7. **Serve and Enjoy:** Serve the miso aioli as a dip, spread, or sauce with your favorite dishes. See the serving suggestions below for inspiration.
## Tips for the Best Miso Aioli
* **Use High-Quality Ingredients:** The quality of your ingredients will significantly impact the flavor of the aioli. Use good-quality mayonnaise, fresh garlic, and fresh lemon juice.
* **Start with Less Miso:** Miso paste can be quite potent, so start with a smaller amount and add more to taste. You can always add more, but you can’t take it away.
* **Mince the Garlic Finely:** Finely minced garlic will incorporate better into the aioli and prevent large, pungent pieces.
* **Don’t Overmix:** Overmixing can cause the aioli to become thin and watery. Mix just until the ingredients are combined.
* **Chill Before Serving:** Chilling the aioli allows the flavors to meld together and the aioli to thicken slightly.
* **Adjust to Your Taste:** Don’t be afraid to experiment with the recipe and adjust the ingredients to your personal preferences.
## Variations on Miso Aioli
Here are some ideas for variations on the basic miso aioli recipe:
* **Spicy Miso Aioli:** Add a pinch of red pepper flakes or a dash of sriracha for a spicy kick.
* **Yuzu Miso Aioli:** Substitute the lemon juice with yuzu juice for a unique citrus flavor.
* **Wasabi Miso Aioli:** Add a small amount of wasabi paste for a pungent and spicy flavor.
* **Black Garlic Miso Aioli:** Use black garlic instead of regular garlic for a sweeter and more complex flavor.
* **Sesame Miso Aioli:** Add more toasted sesame oil and a sprinkle of sesame seeds for a nuttier flavor.
* **Herb Miso Aioli:** Add chopped fresh herbs like chives, parsley, or cilantro for a fresh and vibrant flavor.
* **Vegan Miso Aioli:** Use vegan mayonnaise instead of regular mayonnaise. Ensure the miso paste is also vegan (some brands may use bonito flakes). The rest of the recipe remains the same.
* **Smoked Paprika Miso Aioli:** A pinch of smoked paprika can add a delicious smoky depth.
* **Honey Miso Aioli:** A touch of honey or maple syrup can add a touch of sweetness and balance the savory flavors.
## Serving Suggestions for Miso Aioli
Miso aioli is a versatile condiment that can be used in a variety of ways. Here are some serving suggestions:
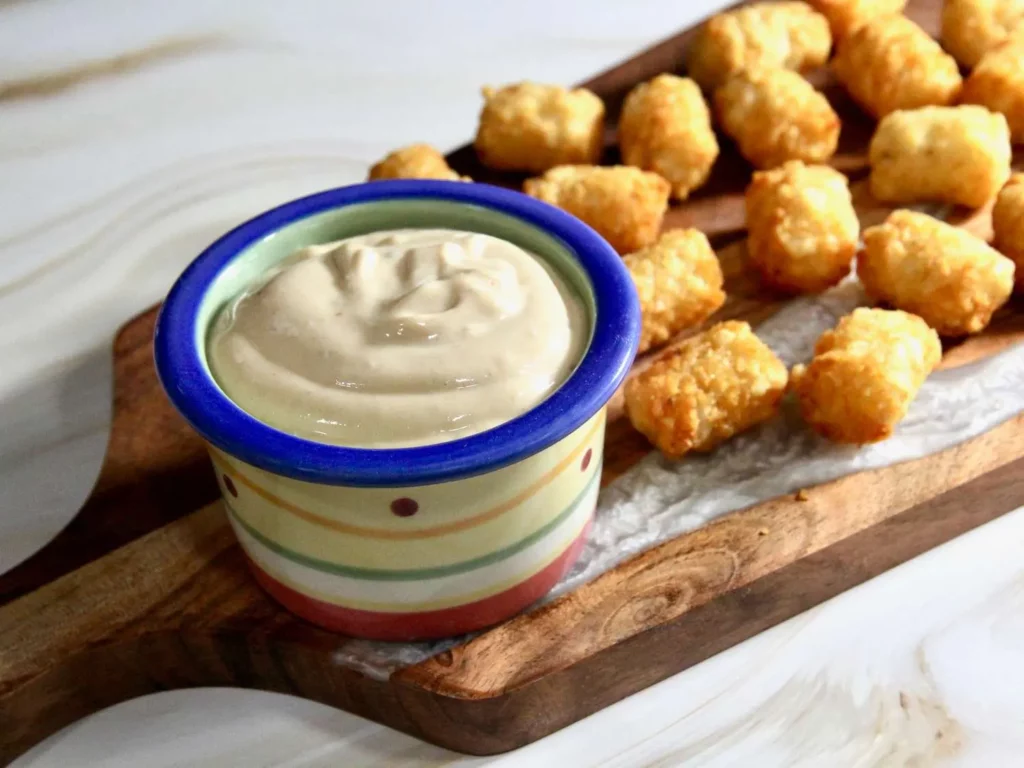
* **Dip for Fries and Vegetables:** Serve it as a dip for French fries, sweet potato fries, roasted vegetables (broccoli, carrots, asparagus), or raw vegetables (crudités).
* **Spread for Sandwiches and Burgers:** Use it as a spread for sandwiches, burgers, and wraps. It’s particularly delicious on chicken sandwiches, veggie burgers, and BLTs.
* **Sauce for Grilled Meats and Seafood:** Drizzle it over grilled chicken, steak, fish, or shrimp. It adds a burst of flavor and richness to any protein.
* **Topping for Eggs:** Top fried, scrambled, or poached eggs with a dollop of miso aioli. It’s a delicious way to elevate your breakfast or brunch.
* **Dressing for Salads:** Thin it with a little water or rice vinegar and use it as a dressing for salads. It’s especially good on Asian-inspired salads with ingredients like edamame, seaweed, and sesame seeds.
* **Accompanying Sushi and Sashimi:** Use it as a dipping sauce for sushi and sashimi. Its savory and umami flavors complement the flavors of raw fish perfectly.
* **Drizzle on Grain Bowls:** Add a spoonful to grain bowls with quinoa, rice, or farro. It adds flavor and moisture to the dish.
* **With Avocado Toast:** Elevate your avocado toast with a smear of miso aioli.
* **As a base for other sauces:** Use it as a base for creating other sauces, such as a miso ranch or a miso thousand island.
## Storage Tips for Miso Aioli
* **Refrigerate:** Store miso aioli in an airtight container in the refrigerator. It will keep for up to 3-5 days.
* **Do Not Freeze:** Freezing is not recommended as it can change the texture of the mayonnaise and make the aioli watery.
* **Check for Spoilage:** Before using, check the aioli for any signs of spoilage, such as a sour smell or discoloration. If you notice any of these signs, discard it.
## Miso Aioli: The Flavor Booster You Need
Miso aioli is a simple yet incredibly flavorful condiment that can transform your meals. With its umami-rich flavor and versatile nature, it’s a must-have in any kitchen. Experiment with different types of miso and flavor combinations to create your perfect version of this delicious sauce. Whether you’re dipping fries, spreading it on sandwiches, or drizzling it over grilled meats, miso aioli will add a burst of flavor that will leave you wanting more. So, gather your ingredients, follow the simple steps, and get ready to experience the umami magic of miso aioli!
Enjoy!